Introduction
Video editing is an essential skill in today’s digital world, whether you are a content creator, filmmaker, or social media influencer. With the right techniques and software, you can transform raw footage into a polished, professional-looking video that engages and captivates your audience. In this guide, I will share my experience and provide a detailed step-by-step tutorial on video editing using Adobe Premiere Pro while also listing other software options available in the market.
Step 1: Choosing the Right Software
Before diving into the editing process, selecting the right software is crucial. There are many video editing programs available, each with its own strengths:
- Adobe Premiere Pro (Professional, industry standard, used for films and social media content)
- Final Cut Pro (Exclusive to Mac users, powerful and user-friendly)
- DaVinci Resolve (Great for color correction and high-end post-production)
- iMovie (Beginner-friendly, available for macOS and iOS users)
- HitFilm Express (Good for VFX and action-packed videos)
- Filmora (Easy-to-use interface, suitable for beginners)
- Camtasia (Ideal for screen recording and tutorial-based content)
- CapCut (Popular for mobile and social media content editing)
While all these tools have their advantages, in this guide, we will focus on Adobe Premiere Pro due to its versatility and industry-wide adoption.
Step 2: Setting Up Your Project in Adobe Premiere Pro
Once you have Adobe Premiere Pro installed, follow these steps to set up your project:
- Open Premiere Pro and click on New Project.
- Give your project a name and choose a location to save it.
- Set the video settings such as resolution (1080p or 4K) and frame rate (24, 30, or 60 FPS).
- Click OK to create your project.
Step 3: Importing Footage and Organizing Files
Proper organization makes the editing process more efficient. Follow these steps:
- In Premiere Pro, go to the Project Panel and click Import Media.
- Select all your video clips, audio, and other media files.
- Create folders (Bins) inside Premiere Pro to organize your footage (e.g., Video Clips, Audio, Music, Effects, etc.).
- Drag and drop your clips into the timeline for arrangement.
Step 4: Basic Editing Techniques
Now that your files are imported, let’s begin editing:
- Trimming Clips – Use the Razor Tool (C) or drag the edges of a clip to cut unwanted parts.
- Arranging Clips – Drag clips to reorder them on the timeline.
- Adding Transitions – Use transitions like fades, dissolves, or cuts to create smooth changes between clips.
- Using Keyboard Shortcuts – Learn shortcuts like:
- C – Razor Tool (cut clips)
- V – Selection Tool
- Spacebar – Play/Pause
- Ctrl + S (Cmd + S on Mac) – Save project frequently
Step 5: Adding Audio and Background Music
Audio is just as important as visuals. To enhance your video:
- Import background music and drag it into the Audio Track.
- Adjust volume levels to ensure voice and music balance.
- Add fade-ins and fade-outs for smooth audio transitions.
- Use the Essential Sound Panel for advanced audio mixing.
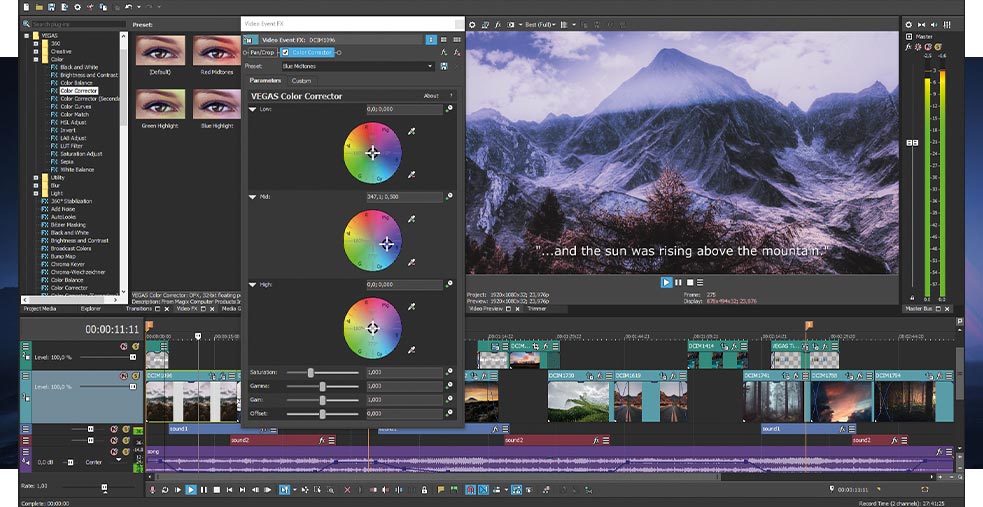
Step 6: Applying Effects and Color Correction
Adding effects can enhance the look and feel of your video:
- Open the Effects Panel and drag effects onto your clips.
- Use the Lumetri Color Panel for color grading.
- Adjust brightness, contrast, saturation, and white balance.
- Apply LUTs (Lookup Tables) for a cinematic feel.
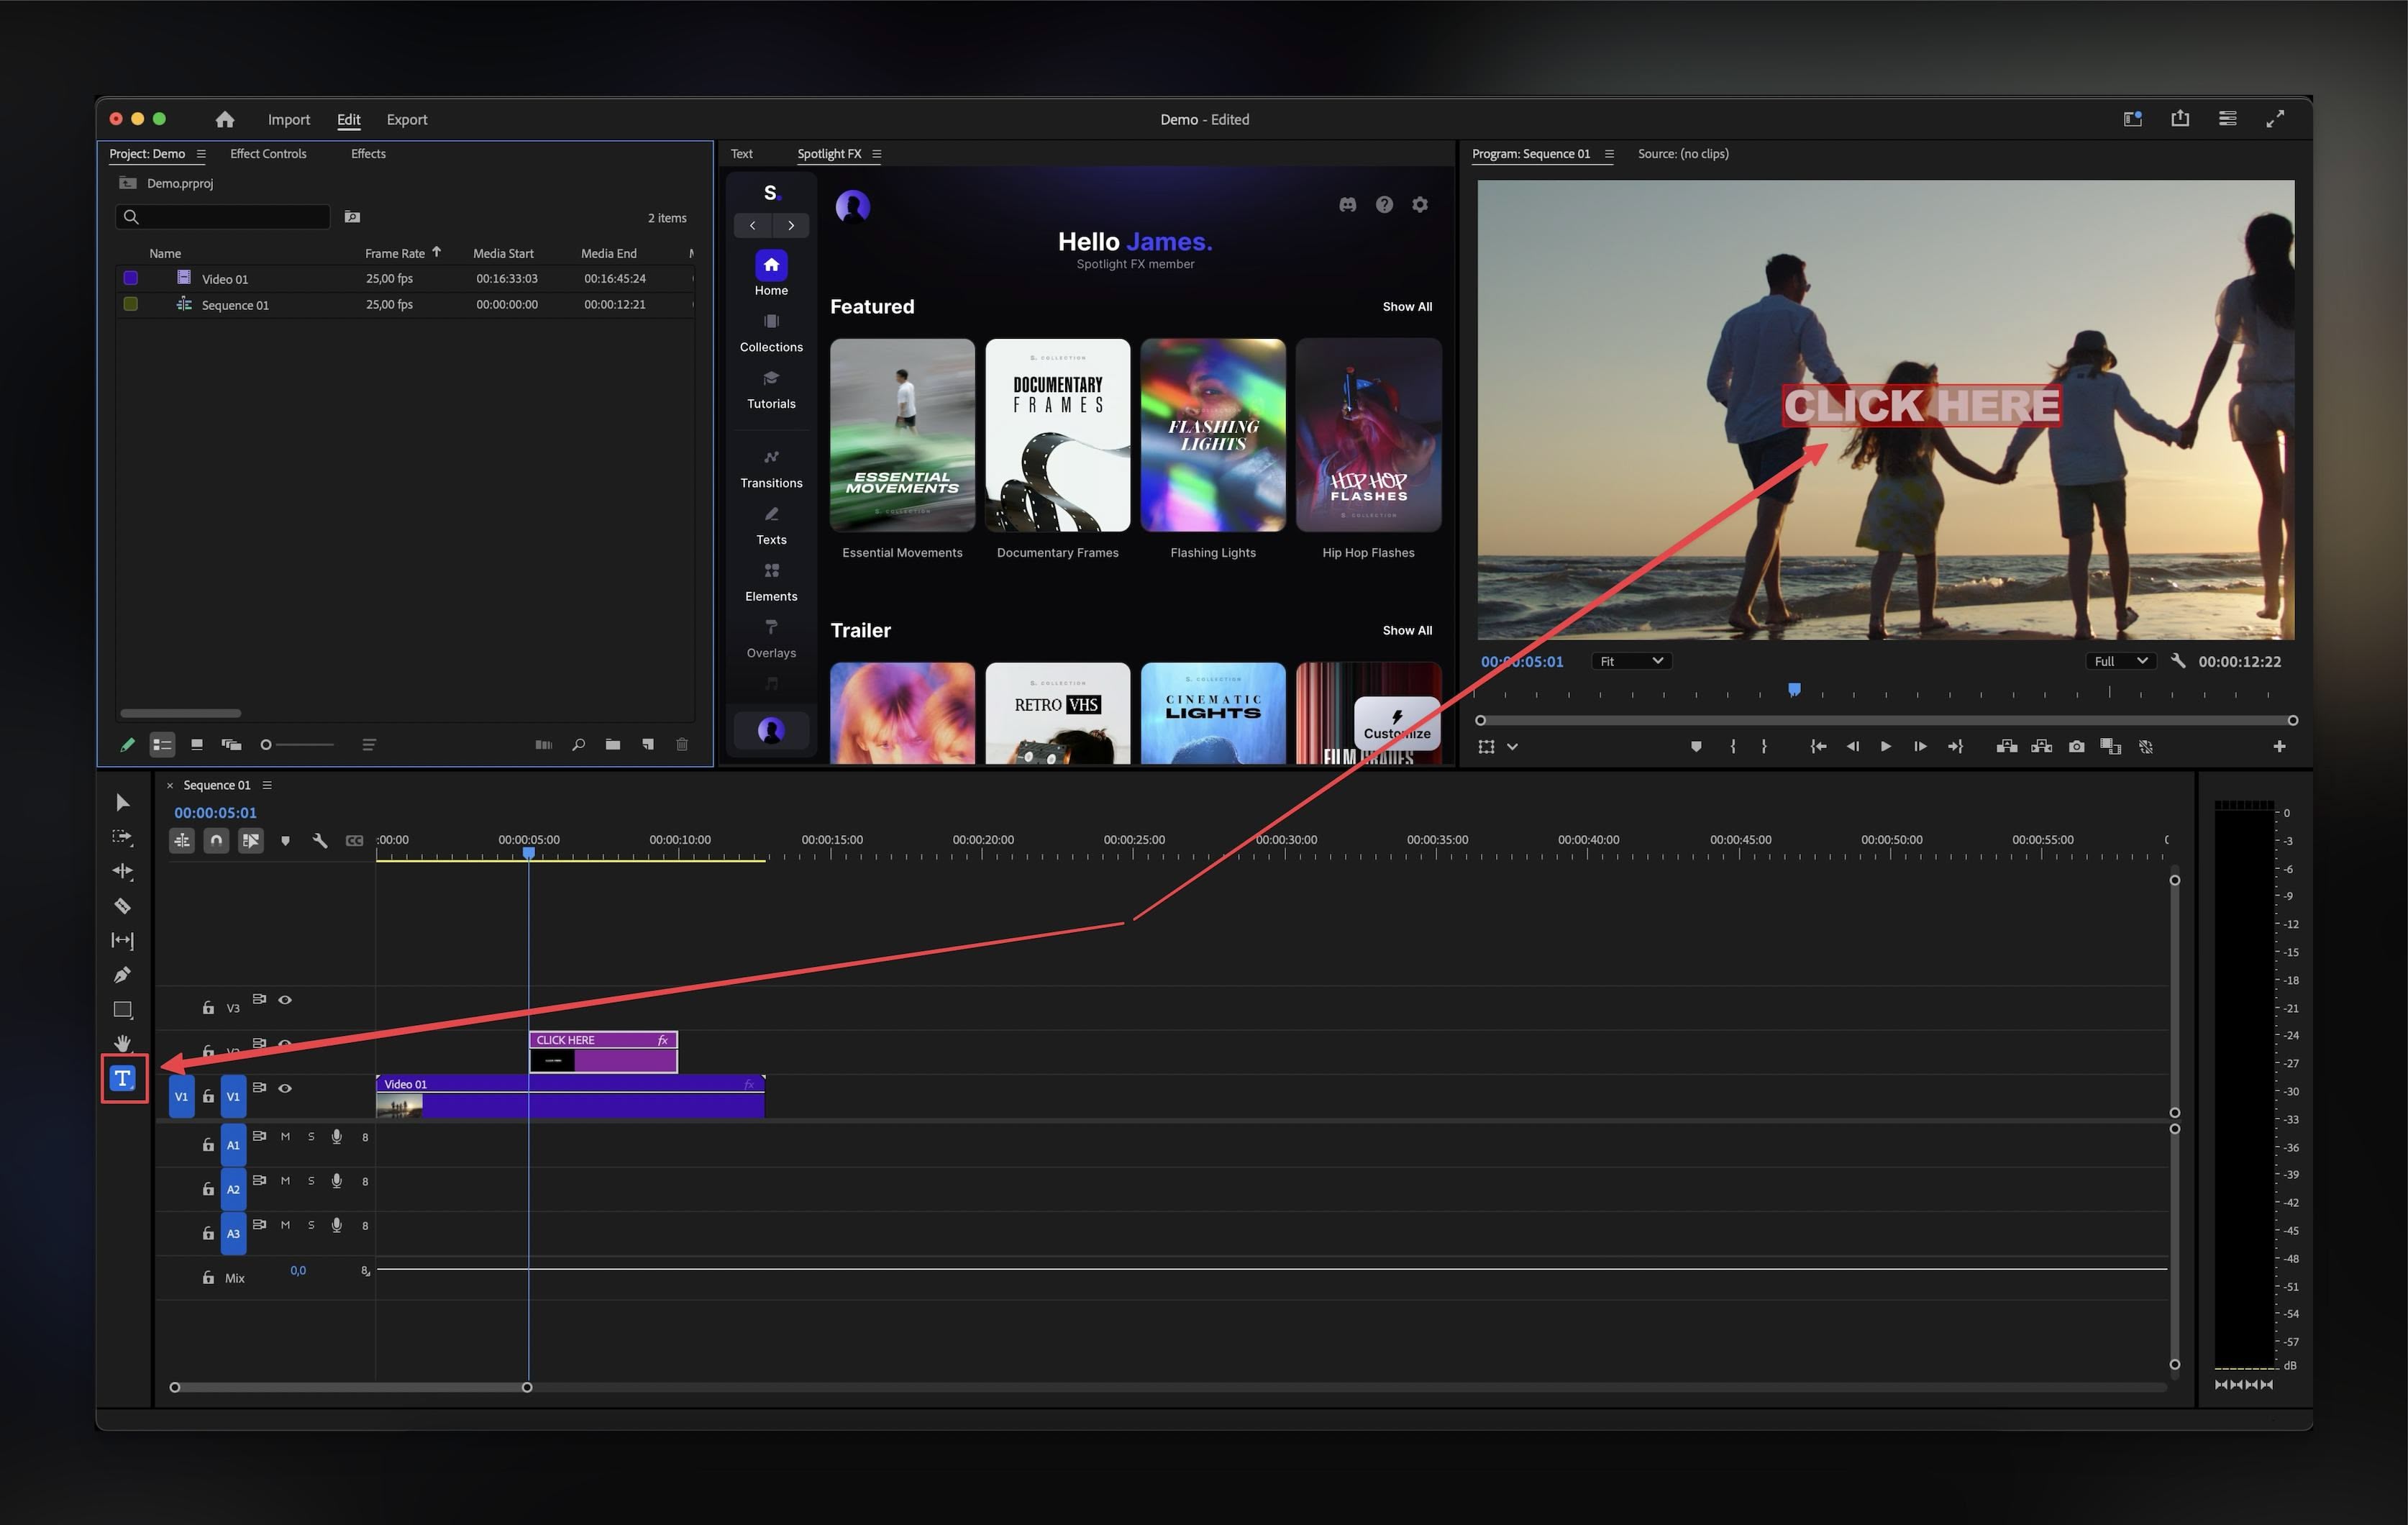
Step 7: Adding Text, Titles, and Graphics
To add text or captions:
- Open the Essential Graphics Panel.
- Select Text Tool (T) and type your text.
- Customize fonts, colors, and animations.
- Use templates for professional-looking titles.
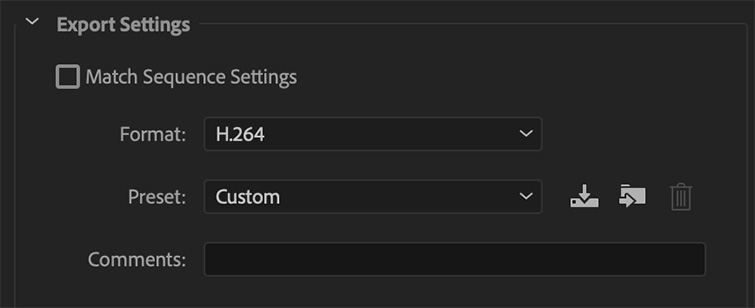
Step 8: Exporting Your Final Video
After completing your edits, export your video for sharing:
- Go to File > Export > Media.
- Choose H.264 format for best compatibility.
- Adjust resolution and bitrate settings.
- Click Export and wait for the rendering process to finish.
Conclusion
Mastering video editing takes time, practice, and patience. Adobe Premiere Pro offers extensive tools and features to create stunning videos, whether for social media, YouTube, or professional projects. If u Promotional Video Production Company in Chennai Contact Sage, they provide best service. want Keep experimenting with effects, transitions, and color grading to develop your unique editing style. Happy editing!